
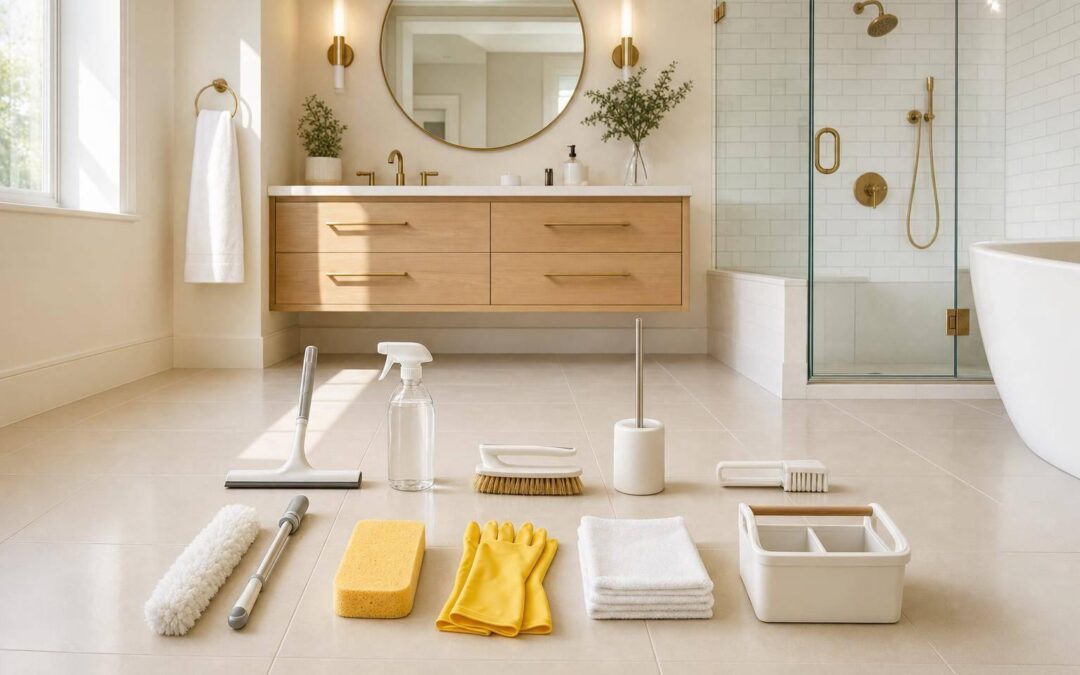
Bathrooms are small, but they rarely feel quick to clean.
That’s because they combine nearly every annoying cleaning challenge in one compact space: soap scum, hard water buildup, hair, splashes around the toilet, cloudy mirrors, damp corners, and surfaces that all seem to need different products. For busy homeowners, landlords, and business owners, the real frustration isn’t just the mess. It’s the sense that bathroom cleaning takes too long for results that don’t last.
The video behind this article tackles that problem directly. Its core message is simple: a faster bathroom deep-clean starts with better sequence, smarter product choices, and more deliberate technique. Rather than scrubbing harder, the focus is on reducing wasted motion and using a system that lets each step do more work.
This article expands on those ideas and turns them into a clear, practical process you can use at home or in a small commercial setting.
Key Takeaways
- Declutter first so you can clean every surface without working around bottles, tools, or personal items.
- Clean top to bottom and zone by zone to avoid redoing work and to make the process faster.
- Treat the entire toilet as a contaminated surface, including the base and surrounding floor.
- Use enzyme cleaner around the toilet base if lingering urine odors are part of the problem.
- Soap scum responds best to the right chemistry, not just aggressive scrubbing.
- Different surfaces need different products; for example, natural stone counters should not be cleaned with vinegar.
- Use flat-weave microfiber on mirrors to reduce streaking and lint.
- Hand-cleaning a small bathroom floor can be faster than bringing in multiple tools, especially when hair is the main issue.
- Rinsing and drying matter; a surface can be clean but still look dirty if residue remains.
- Timing your routine helps you find inefficiencies, which is one of the fastest ways to cut cleaning time over the long run.
sbb-itb-5fea4da
Why Bathroom Cleaning Feels So Slow
A bathroom isn’t difficult only because it gets dirty. It’s difficult because the dirt is varied.
You’re often dealing with:
- Mineral deposits from water
- Soap scum on tubs, tile, and glass
- Organic grime around drains and toilets
- Dust mixed with humidity
- Hair on floors and in sinks
- Surface-specific concerns such as acrylic tubs or marble counters
That means speed comes less from "working fast" and more from working in the right order. The video emphasizes this well: if you begin with cluttered counters, random product use, or no clear sequence, you waste time doubling back.
For property owners and managers, this matters beyond appearances. Bathrooms are one of the first places people notice when judging cleanliness, professionalism, and maintenance standards.
1. Start With a Reset: Remove Everything in the Way
Before any spraying or scrubbing begins, clear the room.
The video recommends removing items from counters and the tub area so surfaces are accessible. That advice sounds basic, but it has outsized impact. Clutter creates visual noise and forces you to clean in fragments. A proper reset makes the room easier to tackle mentally and physically.
What to move out temporarily
- Toothbrush holders
- Soap dishes
- Shampoo and body wash bottles
- Decorative items
- Bath toys
- Countertop organizers
- Trash cans if they block edges or corners
If you manage rental or shared spaces, this step also gives you a chance to spot hidden grime rings, leaks, or product residue that usually stays concealed.
2. Use a System, Not Random Effort
One of the smartest ideas in the video is that bathroom cleaning should be taught like a professional workflow. That means following a repeatable pattern instead of improvising each time.
A useful order looks like this:
- Remove clutter
- Apply products so they can dwell
- Clean the toilet exterior
- Clean the toilet bowl
- Tackle tub, tile, and shower glass
- Clean mirrors
- Clean sink and countertop
- Finish with the floor
This sequence works because it lets chemistry do some of the work while you move through the room. For example, toilet bowl cleaner can start loosening buildup while you handle the outside of the toilet. Likewise, shower products can sit briefly before scrubbing.
In other words, speed comes from overlap, not rushing.
3. Treat Toilet Cleaning as a Full-Surface Job
Many people clean only the obvious parts of the toilet: seat, rim, and bowl. The video argues for a more complete approach, and that’s the right call.
The toilet should be viewed as a whole-unit cleaning task:
- Tank lid
- Flush handle
- Tank exterior
- Lid
- Seat top and underside
- Rim area
- Outer bowl
- Base
- Floor around the base
That approach is especially important in homes with children, shared bathrooms, or heavy use. Splash and aerosolized residue don’t stay neatly contained.
A smarter toilet-cleaning approach
The video suggests spraying the entire toilet exterior first, then using toilet bowl cleaner under the rim. This is efficient because both products begin working before you wipe or brush.
It also recommends using paper towel on the toilet to avoid cross-contamination. That’s a practical choice for many households, especially when dealing with the base and floor contact points. In a more sustainability-focused setup, some people may prefer disposable disinfecting wipes or designated washable cloths reserved only for toilet cleaning, but the video specifically highlights paper towel.
Where enzyme cleaner helps
One of the most useful details in the video is the suggestion to use an enzyme cleaner around the toilet base for odor issues. That matters because not all bathroom smells are solved by regular surface cleaner. If urine residue has seeped into seams or edges, an enzyme-based product can break down odor-causing organic matter more effectively than general-purpose sprays.
For anyone dealing with persistent restroom odors in a home, rental unit, office, or vehicle-adjacent wash area, this is an important distinction: sanitized-looking and odor-free are not always the same thing.
4. Don’t Underestimate the Toilet Base
The speaker makes a point that many people avoid the toilet base, and for good reason: it’s unpleasant. But it’s also where neglected grime can build up and where odors can linger.
This is one of those areas where avoidance creates more work later. A quick, regular pass with a dedicated detail brush or old toothbrush can prevent hardened buildup.
If the bathroom still smells "off" even after cleaning visible surfaces, this zone is a prime suspect.
5. Match the Product to the Problem in the Tub and Shower
The video spends time on one of the most frustrating bathroom issues: soap scum.
That’s useful because people often attack soap scum with force when what it really needs is the right cleaner and enough contact time. The speaker mentions a homemade tub-and-tile paste using baking soda and hydrogen peroxide, noting that it helps cut through residue and may brighten grout.
What matters most here is not the exact formula but the logic behind it:
- Paste or cling cleaners work well on vertical tile because they stay in place longer
- Mild abrasion can help remove stubborn buildup
- Hydrogen peroxide-based mixtures may help with discoloration, though results depend on the type and cause of the staining
- Rinsing thoroughly is essential when baking soda is involved, since residue can remain
The larger lesson
For readers maintaining bathrooms in family homes or commercial properties, the takeaway is this: choose products based on the soil type, not habit.
Use stronger soap-scum solutions where buildup is heavy. Use gentler methods where surfaces are delicate. And don’t assume one bathroom spray is ideal for every job.
6. Use Low-Abrasion Methods on Delicate Surfaces
The video notes an acrylic tub and recommends minimizing abrasion. That’s important advice well beyond this one example.
Acrylic, fiberglass, and some coated finishes can scratch more easily than porcelain or ceramic. Once scratched, they trap grime faster and become harder to keep looking clean.
Better practice for delicate tubs and surrounds
- Use a non-scratch sponge
- Avoid harsh scrub pads unless the surface manufacturer allows them
- Let the cleaner dwell before scrubbing
- Test unfamiliar cleaners in a small area first
This is especially relevant in rental properties and hospitality settings, where repeated aggressive cleaning can shorten the life of fixtures.
7. Check for Soap Scum by Feel, Not Just Sight
One of the most practical tips in the video is to test cleaned tub surfaces with your hand. If the surface still feels draggy or resistant, soap scum may remain. If it feels smooth, you’re likely done.
That tactile check is a better finishing test than visual inspection alone because bathroom lighting can hide residue.
This advice translates well to:
- Tub walls
- Shower shelves
- Tile
- Glass
- Faucet bases
For professionals and detail-oriented homeowners alike, this is a great example of using a simple physical cue instead of guessing.
8. Clean Shower Glass With Streak Prevention in Mind
Cloudy shower glass can make an otherwise clean bathroom look neglected. The video recommends using full-strength vinegar on glass shower surfaces, then scrubbing with a non-scratching sponge, rinsing, and buffing.
That method is aimed at soap scum removal, not just shine. And that distinction matters.
Why the final buff makes a difference
A lot of people stop after rinsing. But leftover moisture can dry into spots, especially in hard-water areas common across many U.S. regions. Buffing the glass dry improves the finished look and helps prevent that "still dirty" appearance.
If vinegar is used, keep in mind the broader surface rule from the video: what works on glass may not be safe for natural stone nearby.
9. Mirrors Need the Right Cloth as Much as the Right Cleaner
The mirror section of the video is brief but strong. The main point: use vinegar and a flat-weave microfiber cloth to reduce streaks.
That fabric choice is more important than many people realize. Thicker, terry-style cloths often leave lint or create streaks because they hold and redistribute too much moisture unevenly.
For a cleaner finish:
- Spray lightly rather than soaking the mirror
- Fold the cloth for multiple clean sides
- Buff in overlapping strokes
- Finish with a dry section of the cloth if needed
This is a small adjustment that improves visible results quickly.
10. Be Surface-Aware at the Sink and Counter
The video rightly separates sink cleaning from countertop cleaning because the materials may need different care.
In the example shown, the counter is marble, so vinegar is avoided. That’s an important caution. Acidic cleaners can etch natural stone, dulling the finish and causing permanent damage.
A practical decision rule
Use:
- Acidic solutions like vinegar where appropriate, such as certain sinks, mirrors, or soap-scum-prone non-stone surfaces
- Stone-safe cleaners on marble, granite, or other natural stone surfaces
If the counter material is unknown, the safest move is to verify the manufacturer guidance or use a pH-neutral stone-safe cleaner until confirmed.
That kind of product discipline saves money over time, especially in upscale residential bathrooms or client-facing business spaces.
11. Use Detail Tools Strategically, Not Everywhere
The video suggests using an old toothbrush for edges and tight areas around sinks, toilet bases, and similar details. That’s sensible because bathrooms are full of seams, caulk lines, faucet crevices, and hardware edges that broad cloths miss.
The deeper insight here is that detail tools should be targeted, not automatic. If you use a small brush everywhere, you slow yourself down. If you save it for problem zones, it becomes a time-saver.
Best uses include:
- Around faucet bases
- Overflow holes and sink rims
- Grout lines with visible buildup
- Toilet bolt caps and base seams
- Tight corners where wall meets fixture
The video also notes the importance of separating brushes by task. A brush used near the toilet should not migrate to sink duty.
12. Clean the Floor Last – and Consider Doing It by Hand
One of the more opinionated points in the video is that hand-cleaning the bathroom floor with a microfiber cloth can be more effective than bringing in both a vacuum and mop.
That won’t suit everyone, but the reasoning is solid for small bathrooms. Hair is often the main issue, and a microfiber cloth can grab it quickly while also wiping the floor at the same time.
Why this works in small spaces
- Less setup time
- Easier access around the toilet and vanity
- Better pickup of hair along edges
- More control in tight layouts
The video also mentions using an S-pattern to collect debris toward the exit. That’s a smart efficiency move because it prevents stepping back onto cleaned sections.
For larger bathrooms, not specified in the video, a different approach may be more practical. But for standard household layouts, this method has real merit.
13. Rinse and Drying Are Part of Cleaning, Not Optional Extras
A recurring idea throughout the video is to rinse well and buff dry, especially on tubs and glass.
This is more than cosmetic. Residue left behind from cleaners or loosened grime can:
- Dull the finish
- Attract new dirt faster
- Create streaks
- Leave gritty texture
- Make surfaces look half-cleaned
Drying also improves perception. In residential and commercial settings alike, "clean" is partly visual, and water spots undermine the result.
14. Faster Cleaning Comes From Repetition and Timing
Near the end, the video encourages viewers to time themselves and then look for ways to reduce cleaning time.
That advice deserves more attention. In process improvement terms, timing reveals friction points:
- Are you switching products too often?
- Are you walking in and out of the room repeatedly?
- Are you re-cleaning areas because of poor sequence?
- Are you using tools that create extra laundry or setup?
This mindset is especially valuable for busy households, short-term rental hosts, janitorial teams, and owners trying to standardize maintenance.
The goal isn’t speed for its own sake. It’s consistent results with less wasted effort.
A Sample Fast Deep-Clean Routine
If you want to apply the video’s logic in one pass, here’s a streamlined version:
Step 1: Clear surfaces
Remove all portable items from counters, tub ledges, and around the toilet.
Step 2: Pre-apply cleaners
Spray the toilet exterior, apply bowl cleaner under the rim, and put the appropriate cleaner on tile, tub, or shower glass.
Step 3: Clean the toilet exterior
Wipe from top downward, changing paper towel as needed. Pay special attention to the base and surrounding floor.
Step 4: Brush the toilet bowl
Scrub under the rim and down into the bowl, then set the brush to drain as appropriate.
Step 5: Scrub tub, tile, and glass
Use the least abrasive tool that will do the job. Rinse thoroughly.
Step 6: Clean mirrors
Use a streak-resistant cloth and buff dry.
Step 7: Clean the sink
Address basin, edges, faucet base, and overflow areas. Use a toothbrush only where needed.
Step 8: Wipe counters safely
Match the cleaner to the counter material.
Step 9: Clean the floor
Use microfiber to gather hair and debris, then wipe outward toward the door.
Step 10: Final dry buff
Dry high-visibility surfaces such as tub edges, glass, and faucets for a finished look.
What the Video Gets Especially Right
Beyond the individual tips, the strongest idea in the video is that bathroom cleaning improves when you understand products, tools, and techniques as a system.
That matters because many people try to solve cleaning problems by buying more products. But if the sequence is poor, the product is wrong for the surface, or the cloth leaves streaks, the extra expense doesn’t help much.
For readers who care about clean, fresh, professional-looking spaces, the real upgrade is operational:
- Fewer unnecessary products
- More intentional surface care
- Better odor control
- Less time spent redoing work
Final Thoughts
A faster bathroom deep-clean doesn’t come from shortcuts. It comes from removing obstacles, using the right chemistry, and cleaning in a sequence that makes sense.
The video’s advice is most useful when viewed as a workflow, not a list of isolated tricks. Clear the room first. Let products dwell. Clean the toilet more thoroughly than feels convenient. Respect delicate surfaces. Rinse well. Dry for finish. And treat speed as a result of better process.
For anyone responsible for keeping a home, rental, office, or shared space fresh and sanitary, that’s the difference between a bathroom that merely looks passable and one that feels genuinely clean.
Source: "Clean Your Bathroom Faster Than Ever!" – Clean My Space, YouTube, May 30, 2026 – https://www.youtube.com/watch?v=lpuP0wgw5nw
Recent Comments