How to Use Bleach Safely at Home Without Overdoing It
Bleach tends to trigger one of two reactions: people either rely on it for everything or avoid it completely. That hesitation makes sense. Bleach is powerful, and when it’s used incorrectly, it can damage surfaces, ruin fabrics, and create unnecessary risks. But when it’s diluted properly and used on the right materials, it can be a practical tool for disinfecting high-risk areas in the home.
The video focuses on a simple idea: bleach is not just for "emergency cleaning." It can be part of regular household sanitation when used carefully, especially in bathrooms, kitchens, and on certain hard, non-porous items.
For homeowners, landlords, and property managers dealing with odor, grime, and germ-prone surfaces, that distinction matters. A fresh-looking room is not always a sanitary one. And in spaces where moisture, food residue, or frequent touch points are involved, disinfecting can serve a different purpose than everyday wiping.
This guide breaks down the video’s practical instructions while adding context about when bleach makes sense, where it doesn’t, and how to use it safely and effectively.
sbb-itb-5fea4da
Key Takeaways
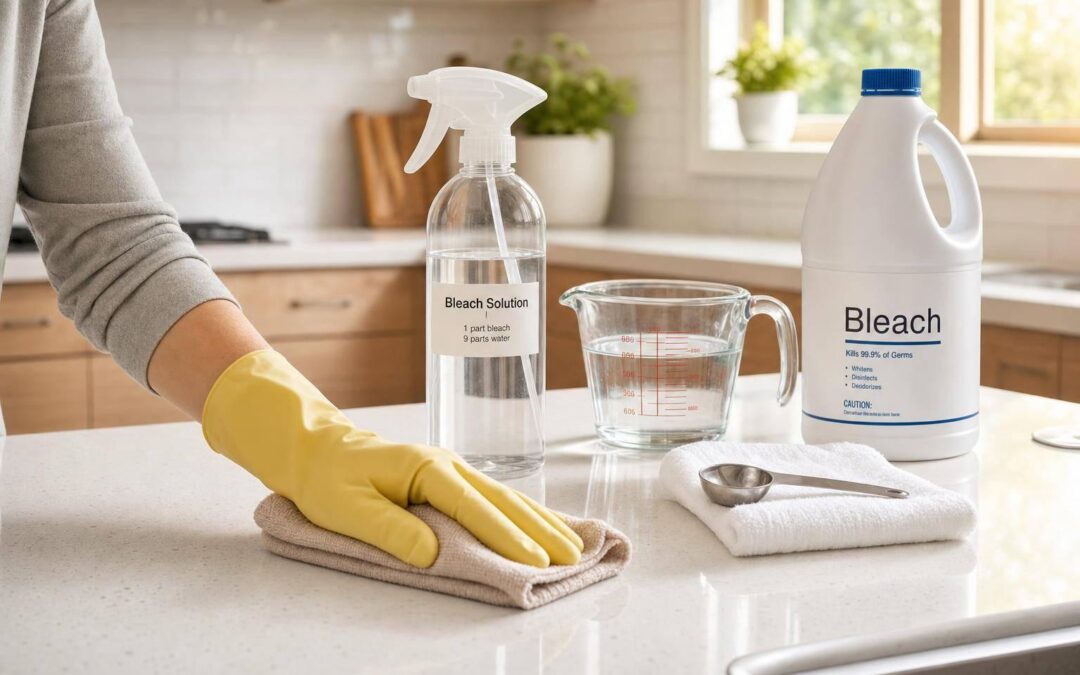
- Always dilute bleach properly. The video repeatedly emphasizes that full-strength bleach should not be used on household surfaces.
- Ventilation matters. Open a window or run a fan before cleaning.
- Pre-clean first. Dust, hair, crumbs, and visible debris should be removed before applying a bleach solution.
- Respect contact time. A surface must stay visibly wet for the recommended time to disinfect effectively.
- Freshly mixed solution works best. Don’t rely on yesterday’s bucket.
- Only use bleach on bleach-safe surfaces. It is not recommended for unsealed natural stone in the video.
- Rinse where appropriate. After cleaning counters, sinks, tubs, and similar surfaces, rinse with water and dry to avoid residue and streaks.
- Use different dilution ratios for different jobs. Bathroom counters, cutting boards, and water bottles do not all use the same mix.
- Bleach can help with odor control, especially around toilets, sinks, and items that tend to develop a musty smell.
- Protect clothing and skin. Gloves are essential, and darker fabrics can discolor if splashed.
First, Understand What Bleach Does Well
Bleach is best viewed as a targeted disinfecting tool, not a one-size-fits-all cleaner.
In the video, bleach is used for three main purposes:
- Disinfecting hard surfaces
- Reducing grime and staining, especially in bathrooms
- Deodorizing areas prone to unpleasant smells
That matters because many people expect one product to degrease, sanitize, remove soap scum, and make everything shine in one pass. Bleach can support some of those goals, but it works best when the surface has already been cleared of loose dirt and buildup.
That’s why one of the most important lessons in the video is to pre-clean dry debris first. If dust, hair, or residue is still sitting on the surface, you’re asking the disinfectant to work through a barrier.
Bleach Safety Basics to Get Right Every Time
Before getting into rooms and surfaces, the video lays out several non-negotiables. These are worth treating as the foundation of any bleach routine.
1. Make ventilation a habit
Good airflow is the first safety step. Open windows or turn on a fan before you begin.
For smaller spaces like powder rooms, laundry areas, or tight bathrooms, this is especially important. Many people clean these rooms quickly and forget that stronger-smelling chemicals can accumulate fast.
2. Wear gloves
The speaker notes that your hands are one of your most valuable cleaning tools. That’s more than a nice phrase. Repeated chemical exposure can dry and irritate skin, especially if you clean often.
3. Never use bleach at full strength
This is one of the clearest warnings in the video. Stronger is not better. Undiluted bleach can damage surfaces and increase the chances of mishaps.
4. Match the dilution to the task
The video uses more than one bleach-to-water ratio. That’s a critical point. A bathroom countertop does not require the same concentration as soaking a cutting board or sanitizing a water bottle.
5. Mix fresh solution
The video states that disinfecting bleach works best when freshly mixed. If you made a bucket yesterday, discard it and prepare a new batch before cleaning again.
6. Confirm the surface is bleach-safe
The presenter specifically notes that the bathroom cleaning mix is not recommended for unsealed natural stone. This is a useful reminder that attractive surfaces are not always chemical-friendly. Stone, specialty finishes, and some colored materials may react poorly.
A Better Way to Think About "Cleaning" vs. "Disinfecting"
One of the most useful ideas in the video is the difference between making a surface look clean and actually disinfecting it.
Those are not always the same thing.
A surface can be wiped down and still not be disinfected if:
- It wasn’t cleaned of residue first
- The bleach was too diluted or mixed incorrectly
- The surface dried too soon
- The contact time was too short
The speaker stresses that surfaces must remain wet for a set period. That "dwell time" is what allows the disinfecting action to happen. For busy households and commercial spaces, this is often the step people skip.
If you wipe on bleach and immediately wipe it off, you may reduce grime but not get the sanitation benefit you expected.
How to Use Bleach in the Bathroom
Bathrooms are where bleach often has the most obvious value. They combine moisture, body soils, lingering odors, and surfaces that are touched frequently.
Recommended bathroom dilution from the video
For sinks, counters, toilet exteriors, and nearby floors, the video uses:
- 1 gallon of cool water
- 1/3 cup of bleach
This mixture is applied after visible debris is removed.
Where it can help most
Sink and countertop areas
Bathroom counters collect more than people realize: toothpaste residue, cosmetics, hand soap buildup, and splashes that dry into a film. The video recommends dipping a towel into the solution, wringing it out, and wiping down the surface.
If disinfecting is the goal, the solution should remain wet on the surface for 6 minutes.
Afterward:
- Rinse with a damp cloth and water
- Dry and buff with a clean microfiber cloth
That last step is more than cosmetic. It helps prevent streaking and water spots, which matters in bathrooms where hard water residue can make a freshly cleaned sink still look dull.
Toilet exterior and the surrounding floor
This is one of the smartest recommendations in the video. Many people clean the bowl and ignore the outer surfaces and the floor nearby. But these are often the areas where splashes, drips, and odor-causing residue build up.
Using the same bathroom dilution:
- Clean the toilet exterior
- Wipe the floor around the base
- Keep surfaces wet for 6 minutes if disinfecting
This step is especially useful in homes with children, shared bathrooms, rental properties, or any high-traffic restroom where odor control matters along with visible cleanliness.
Showers, tubs, mold, and mildew
The video identifies bathrooms as common places for mold and mildew because wet surfaces stay damp longer. Here bleach is used on non-porous surfaces to help remove staining and brighten areas like porcelain and grout.
The key difference is the required time:
- 10 minutes of dwell time for mold and mildew treatment on non-porous surfaces
The presenter also mentions using:
- A non-scratch scrub sponge
- A toothbrush for tile and grout detail work
Then:
- Rinse thoroughly with water
- Dry or buff the area
Practical note for Chicagoland homes
In older homes and multi-unit buildings, bathroom ventilation is not always ideal. That makes moisture control just as important as surface cleaning. Bleach can help address mold-related staining, but if moisture keeps returning, the root issue is still unresolved. Cleaning helps; persistent dampness usually requires a ventilation or maintenance fix too.
How to Use Bleach in the Kitchen
The kitchen is a different environment from the bathroom. Here the concern is not just grime but potential cross-contamination from food handling, especially around sinks, counters, and touch points.
Countertops and sinks
The video uses the same 1 gallon water + 1/3 cup bleach mixture for kitchen counters and sinks.
This is particularly helpful on:
- Countertops used during food prep
- Sink basins
- Areas exposed to raw meat residue
- Frequently touched handles and knobs
Again, if disinfection is the goal, the surface should stay wet for 6 minutes.
The video specifically calls out high-touch areas such as:
- Microwave handles
- Refrigerator handles
- Doorknobs
- Light switches
That’s a useful reminder because these spots often look clean long before they actually are.
Sanitizing cutting boards
For certain kitchen items, the video switches to a milder soak solution:
- 1 gallon of water
- 2 teaspoons of disinfecting bleach
The process shown is:
- Wash the cutting board first with dish soap
- Rinse it well
- Soak it in the bleach solution for 2 minutes
- Remove and allow it to air dry
This sequence is important because food-contact items need both cleaning and sanitizing. The soap removes residue; the bleach solution handles sanitizing.
Why this distinction matters
A lot of household frustration comes from using one routine for every item. The video does a good job of showing that food-contact surfaces need a more precise process. That’s valuable for families, rental turnovers, and small business settings where kitchen sanitation can affect health as much as appearance.
Using Bleach for Kids’ Plastic Toys
This is one of the more practical household uses discussed in the video, especially during cold and flu season or after a child has been sick.
The toy-cleaning solution shown is:
- 1 gallon of water
- 1/3 cup of bleach
The toys are soaked for 6 minutes, with occasional movement if they float so all surfaces stay wet.
After soaking:
- Rinse thoroughly
- Lay out to dry
This method is best suited to hard plastic toys that can tolerate soaking. The video does not specify fabric, plush, battery-powered, or mixed-material toys, so those uses are not specified in the video.
For parents and childcare environments, the broader lesson is that bleach can be effective for periodic sanitizing of shared hard-surface items, but it should be paired with thorough rinsing and material awareness.
Sanitizing Water Bottles That Have Developed Odor
Few everyday items trap smells faster than reusable bottles. If a water bottle starts to smell stale or "funky", the video recommends a sanitizing soak.
Water bottle ratio in the video
- 2 teaspoons of disinfecting bleach per gallon of water
The bottle is soaked for 2 minutes, then:
- Removed from the solution
- Drained completely
- Left to air dry
This is a practical reminder that odor problems are often sanitation problems in disguise. Scrubbing alone may remove visible film but still leave smells behind if the bottle hasn’t been sanitized properly.
The video does not provide material-specific guidance for stainless steel, insulated, or specialty bottles, so readers should treat compatibility as not specified in the video and verify the manufacturer’s care guidance separately.
A Small but Interesting Use: Helping Flowers Last Longer
One of the non-cleaning uses in the video is adding a tiny amount of bleach to vase water to help flowers stay fresher longer.
The mixture shown is:
- 1/4 teaspoon of bleach
- per 1/3 gallon of water
The logic is straightforward: a very small amount can help reduce the microbial growth that shortens vase life.
This is less central than the household sanitation advice, but it does reinforce an important principle seen throughout the video: dose matters. Bleach is effective because it is used carefully and sparingly for a defined purpose, not because more is better.
Common Mistakes People Make With Bleach
The video directly or indirectly highlights several mistakes that cause most bleach-related problems at home.
Using too much
The urge to "make it stronger" is common, but it raises the risk of surface damage and doesn’t improve the process when a tested dilution is already recommended.
Skipping the pre-clean
If crumbs, dust, hair, soap residue, or visible grime remain, disinfecting is less effective.
Ignoring wet contact time
This may be the biggest mistake of all. A quick swipe feels productive, but sanitation depends on how long the surface stays wet.
Using old solution
The video makes clear that bleach solution should be mixed fresh for best effectiveness.
Applying bleach to the wrong material
Natural stone gets a direct caution in the video, but the broader takeaway is that not every attractive or expensive surface should be cleaned the same way.
Forgetting about clothing
Bleach splash damage is easy to underestimate. Dark clothes are especially vulnerable.
Where Bleach Fits in an Overall Home Hygiene Plan
For many households, bleach is not the daily answer for every surface. That’s part of what makes the video useful: it shows where bleach has the most value instead of suggesting it belongs everywhere.
A balanced approach looks like this:
- Use general cleaners for routine dust, grease, and everyday messes
- Use bleach selectively where disinfection matters
- Focus on bathrooms, kitchens, odor-prone zones, and shared high-touch surfaces
- Follow exact dilution and contact-time guidance
For homeowners and business operators, this matters because overusing harsh products can create its own maintenance problems. The goal is not just "stronger cleaning." The goal is appropriate cleaning.
That’s especially relevant in spaces where people notice both scent and sanitation: bathrooms, kitchens, entry points, shared offices, rental units, and vehicle-adjacent storage areas. A room that smells fresher and feels cleaner often starts with better surface practices, not just fragrance.
Final Thoughts
The biggest value in the video is not that bleach can clean a sink or disinfect a counter. Most people already assume that. The real lesson is more specific: bleach only works well when you use the right ratio, the right surface, and the right wait time.
That makes bleach less mysterious and more manageable.
Used correctly, it can help sanitize bathrooms, reduce odor around toilets, refresh kitchen work zones, clean hard plastic toys, and tackle mold-prone non-porous bathroom surfaces. Used carelessly, it becomes one more product that causes frustration.
If there’s one principle worth remembering, it’s this: effective bleach cleaning is methodical, not aggressive. Clean first, dilute properly, keep the surface wet long enough, rinse when needed, and only use it where it belongs.
Source: "How To Actually Clean With Bleach Around Your Home" – Clean That Up, YouTube, May 30, 2026 – https://www.youtube.com/watch?v=DuzQXkTEX1U
Recent Comments