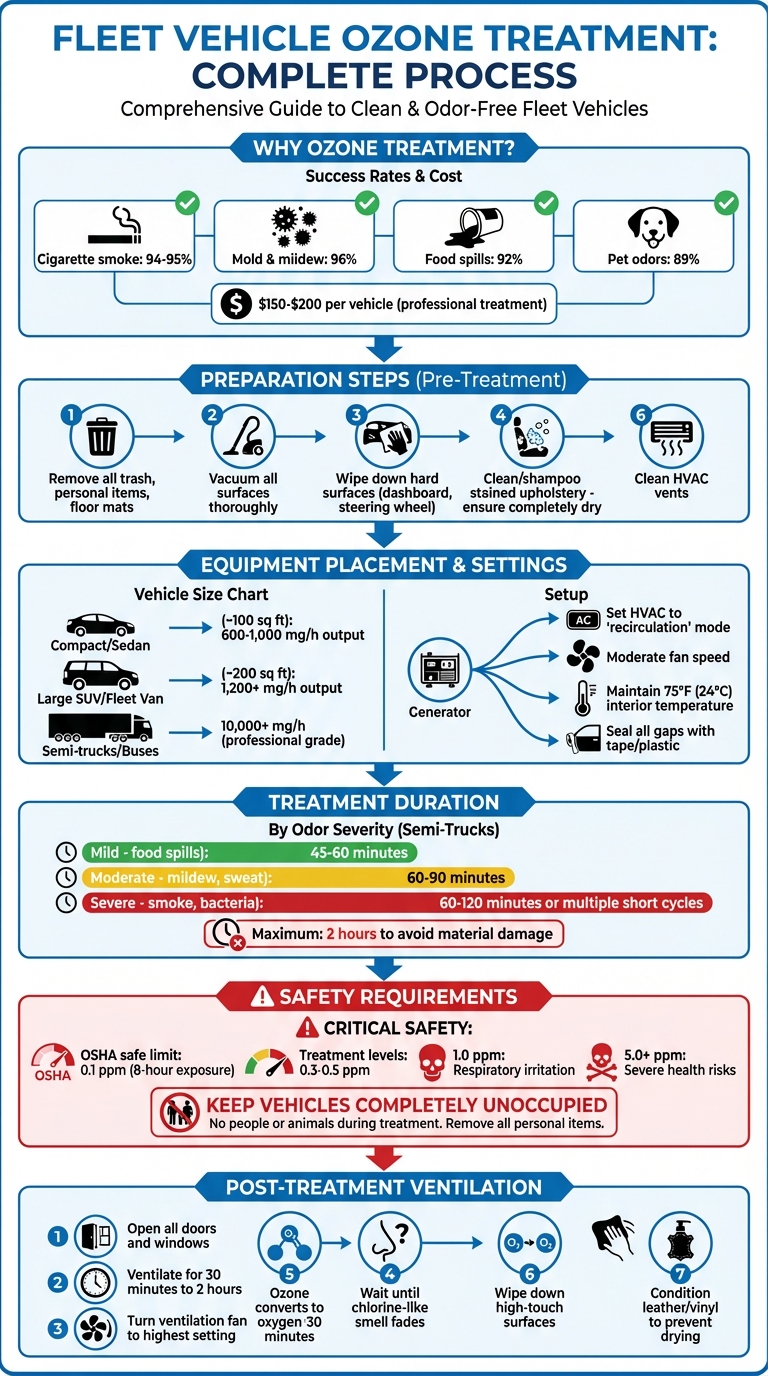
Ozone treatment is one of the most effective ways to eliminate stubborn odors in fleet vehicles. Whether it’s cigarette smoke, spilled food, mold, or pet odors, ozone neutralizes smells at the molecular level instead of just masking them. It also sanitizes interiors by targeting bacteria, viruses, and allergens. This process is highly effective at reducing allergens indoors by neutralizing dust mites and pet dander.
Here’s what you need to know:
- Why odors persist: Smells from tobacco, food, or mold seep into porous materials like upholstery, foam, and HVAC systems, making them hard to remove with standard cleaning methods.
- How ozone works: Ozone gas penetrates deep into surfaces and eliminates odor-causing molecules. It converts back to oxygen after treatment, leaving no chemical residue.
- Preparation steps: Clean the vehicle thoroughly – remove trash, vacuum, and dry surfaces. Address root causes like mold or spills before starting ozone treatment.
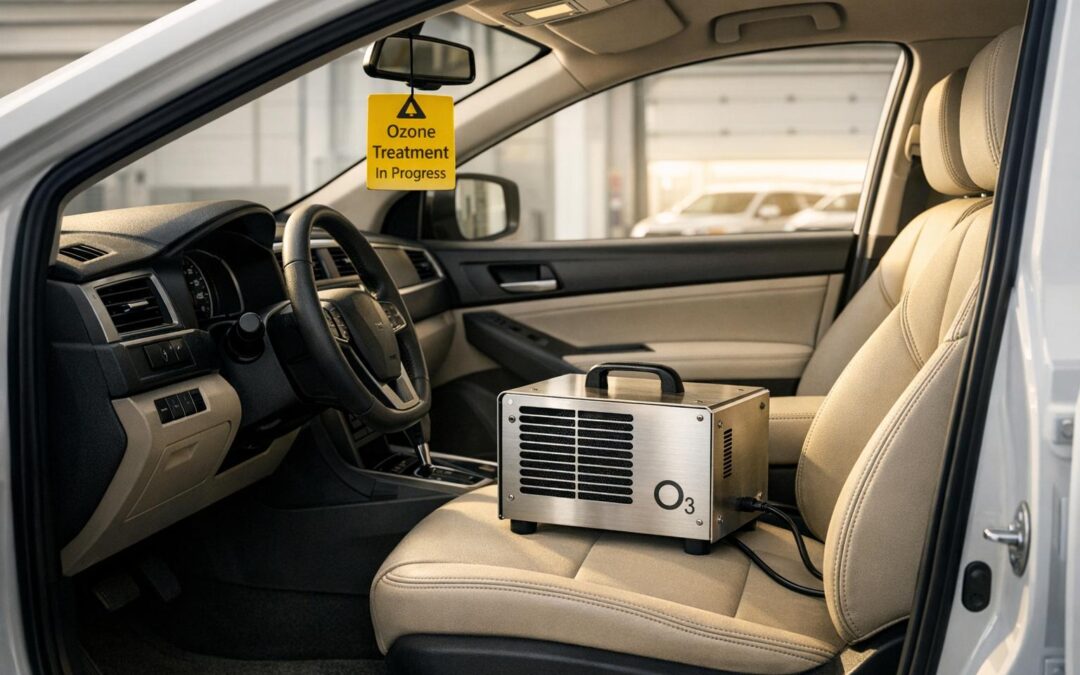
- Safety precautions: Ozone is harmful to inhale. Keep vehicles unoccupied during treatment and ventilate for 30 minutes to 2 hours afterward.
- Cost and benefits: Professional ozone treatments cost around $150–$200 per vehicle and can save money by preventing expensive repairs or replacements.
Ozone treatment not only eliminates odors but also improves air quality, ensuring a better experience for drivers and passengers. Proper preparation, placement of the ozone generator, and post-treatment ventilation are key to success. For fleet operators, services like Ozonated Cleaning LLC offer professional-grade solutions tailored to larger vehicles like trucks and vans.
Fleet Vehicle Ozone Treatment Process: 5-Step Guide with Safety Requirements
Preparing Fleet Vehicles for Ozone Treatment
Pre-Cleaning and Inspection
Ozone works wonders for neutralizing odors, but it can’t handle physical debris. Start by clearing out trash, personal belongings, floor mats, and even items like water bottles, which ozone might damage. Vacuum all surfaces thoroughly, and wipe down hard surfaces – like the dashboard, steering wheel, and gear shift – using a suitable cleaner to remove dust, grime, and oily residues.
If you spot stains on the upholstery, shampoo or spot-clean the affected areas and ensure everything is completely dry before starting ozone treatment. This step is crucial to avoid forming harmful byproducts. Also, be sure to remove odor-causing sources like spoiled food, mold, or cigarette ash, as ozone won’t eliminate the root cause of the smell.
If you notice musty odors when the air conditioning is running, it could mean the HVAC system is harboring odors. Clean the vents thoroughly and think about replacing the cabin air filter after completing the ozone treatment.
Once the cleaning is done, focus on placing the ozone generator correctly for the best results.
Where to Place Ozone Generators
With the vehicle cleaned and ready, proper placement of the ozone generator is key to effective odor neutralization. For sedans, position the generator centrally to ensure even ozone distribution. Use a unit with an output of 600–1,000 mg/h for interiors around 100 sq ft, and opt for 1,200 mg/h or higher for spaces closer to 200 sq ft. Direct the generator’s airflow toward the center of the vehicle to help circulate the ozone evenly.
For larger vehicles like semi-trucks, buses, or RVs, professional-grade ozone generators are ideal. These are usually placed outside the vehicle, with a flexible duct or hose feeding ozone into the cabin through a slightly cracked window. Seal any remaining gaps with materials like cardboard, packing tape, or plastic wrap to prevent ozone from escaping. Running the vehicle’s HVAC system in "recirculation" mode with the fan at a moderate speed helps distribute ozone through the ductwork and vents. Maintaining an interior temperature of about 75°F (24°C) also supports better ozone circulation.
| Vehicle Type | Estimated Interior Size | Recommended Ozone Output | Typical Treatment Time |
|---|---|---|---|
| Compact / Sedan | ~100 sq ft | 600–1,000 mg/h | 20–30 minutes |
| Large SUV / Fleet Van | ~200 sq ft | 1,200+ mg/h | 60 minutes |
| Heavy Odor / Smoke | N/A | High Output | Multiple short cycles |
Following these steps ensures that your ozone treatment complements the cleaning process, effectively neutralizing even the most stubborn odors trapped inside the vehicle.
sbb-itb-5fea4da
Step-by-Step Ozone Treatment Process
Treatment Duration by Odor Severity
The length of ozone treatment depends on the size of the vehicle and how strong the odor is. For mild issues like food spills or light mustiness, shorter cycles will do the trick. However, for more persistent problems – like heavy smoke or bacteria – you’ll need longer sessions or multiple shorter ones with breaks for ventilation.
For most sedans (approximately 100 sq ft of interior space), ozone generators producing 600–1,000 mg/h are sufficient. Larger vehicles, such as cargo vans or semi-trucks, require generators capable of producing at least 1,200 mg/h. To avoid damaging materials like rubber seals, plastic trim, or adhesives, limit high-concentration ozone treatments to two hours or less. When necessary, break the treatment into shorter cycles with ventilation in between.
| Odor Severity | Recommended Run Time for Semi-Trucks |
|---|---|
| Mild (food spills) | 45–60 minutes |
| Moderate (mildew, sweat) | 60–90 minutes |
| Severe (smoke, bacteria) | 60–120 minutes or multiple short sessions with breaks |
Once the treatment duration is set, focus on distributing ozone effectively for the best results.
Ensuring Proper Air Circulation
Even with the correct treatment time, proper air circulation is essential for neutralizing odors throughout the vehicle. Set the HVAC system to "recirculation" mode and use a moderate fan speed. This helps push ozone through air ducts and vents, targeting hidden areas where mold and bacteria tend to linger. Avoid running the air conditioning during the process, as moisture buildup can lead to unwanted chemical byproducts.
Keep all doors and windows shut to maintain ozone concentration. If you’re using an external generator with a hose, seal any gaps with materials like cardboard, tape, or plastic wrap to prevent ozone from escaping. Also, ensure the vehicle interior stays at around 75°F (24°C) for optimal circulation.
Safety Considerations for Ozone Treatment
Keep Vehicles Unoccupied During Treatment
Ozone is a hazardous gas that can cause serious health issues when inhaled. The levels needed to eliminate odors – usually between 0.3 and 0.5 ppm – are far above the Occupational Safety and Health Administration‘s (OSHA) safe exposure limit of 0.1 ppm over an 8-hour period. Inhaling ozone at concentrations as low as 1.0 ppm can irritate the respiratory system, while levels of 5.0 ppm or higher can lead to severe health consequences.
"No person or animal must be inside during ozone treatment due to severe respiratory risks, unlike hydroxyl systems safe for occupied spaces."
Ozone also depletes oxygen in enclosed spaces, making them unsafe to breathe in during treatment. Never enter a vehicle while the ozone generator is running, and make sure fleet staff and bystanders are aware that treatment is underway. Before starting, remove any items from the vehicle that might react with ozone, such as water bottles or personal belongings. Children and pets are particularly vulnerable, so take extra care to ensure the cabin is completely empty.
Once the treatment is complete, proper ventilation is essential to restore safe air quality.
Post-Treatment Ventilation
After the ozone treatment finishes, the vehicle must be thoroughly aired out before anyone enters. Ozone naturally breaks down into oxygen within about 30 minutes, but it’s best to leave all doors and windows open for at least 30 minutes to 2 hours. Some experts recommend waiting an even longer period – 4 to 8 hours – for added safety.
To speed up the process, turn the vehicle’s ventilation fan to its highest setting while keeping windows and doors open. Continue ventilating until the sharp, chlorine-like smell of ozone fades. While the scent may linger for 2 to 3 days, the vehicle is safe to enter once proper ventilation is complete. Afterward, wipe down high-touch areas like the steering wheel and dashboard to remove any leftover residues. If the vehicle has leather or vinyl surfaces, consider conditioning them after treatment to prevent drying or cracking.
Benefits of Ozone Treatment for Fleet Operations
Permanent Odor Elimination
Ozone treatment works by oxidizing odor-causing molecules, effectively removing persistent smells like cigarette smoke, spilled food, pet dander, and mildew. Professional services report impressive success rates: 94–95% for cigarette smoke, 96% for mold and mildew (after addressing moisture issues), 92% for food spills, and 89% for pet-related odors. Because ozone is a gas, it can reach hidden areas that traditional cleaning methods often miss, ensuring a deeper and more thorough treatment.
Cost-Effectiveness for Fleet Management
Odor issues can lead to expensive repairs, such as replacing seats or carpets. Ozone treatment provides a proactive solution, saving fleet managers from these costly fixes. By eliminating odors early, it also helps maintain the interior condition of vehicles, which is key to preserving resale value. Professional ozone treatments are reasonably priced – about $150 per vehicle or $200 for semi-trucks – offering a cost-effective way to protect your investment and avoid downtime. Keeping vehicles clean and odor-free also ensures a better experience for drivers and passengers, which is essential for customer satisfaction and fleet efficiency.
Professional Solutions from Ozonated Cleaning LLC
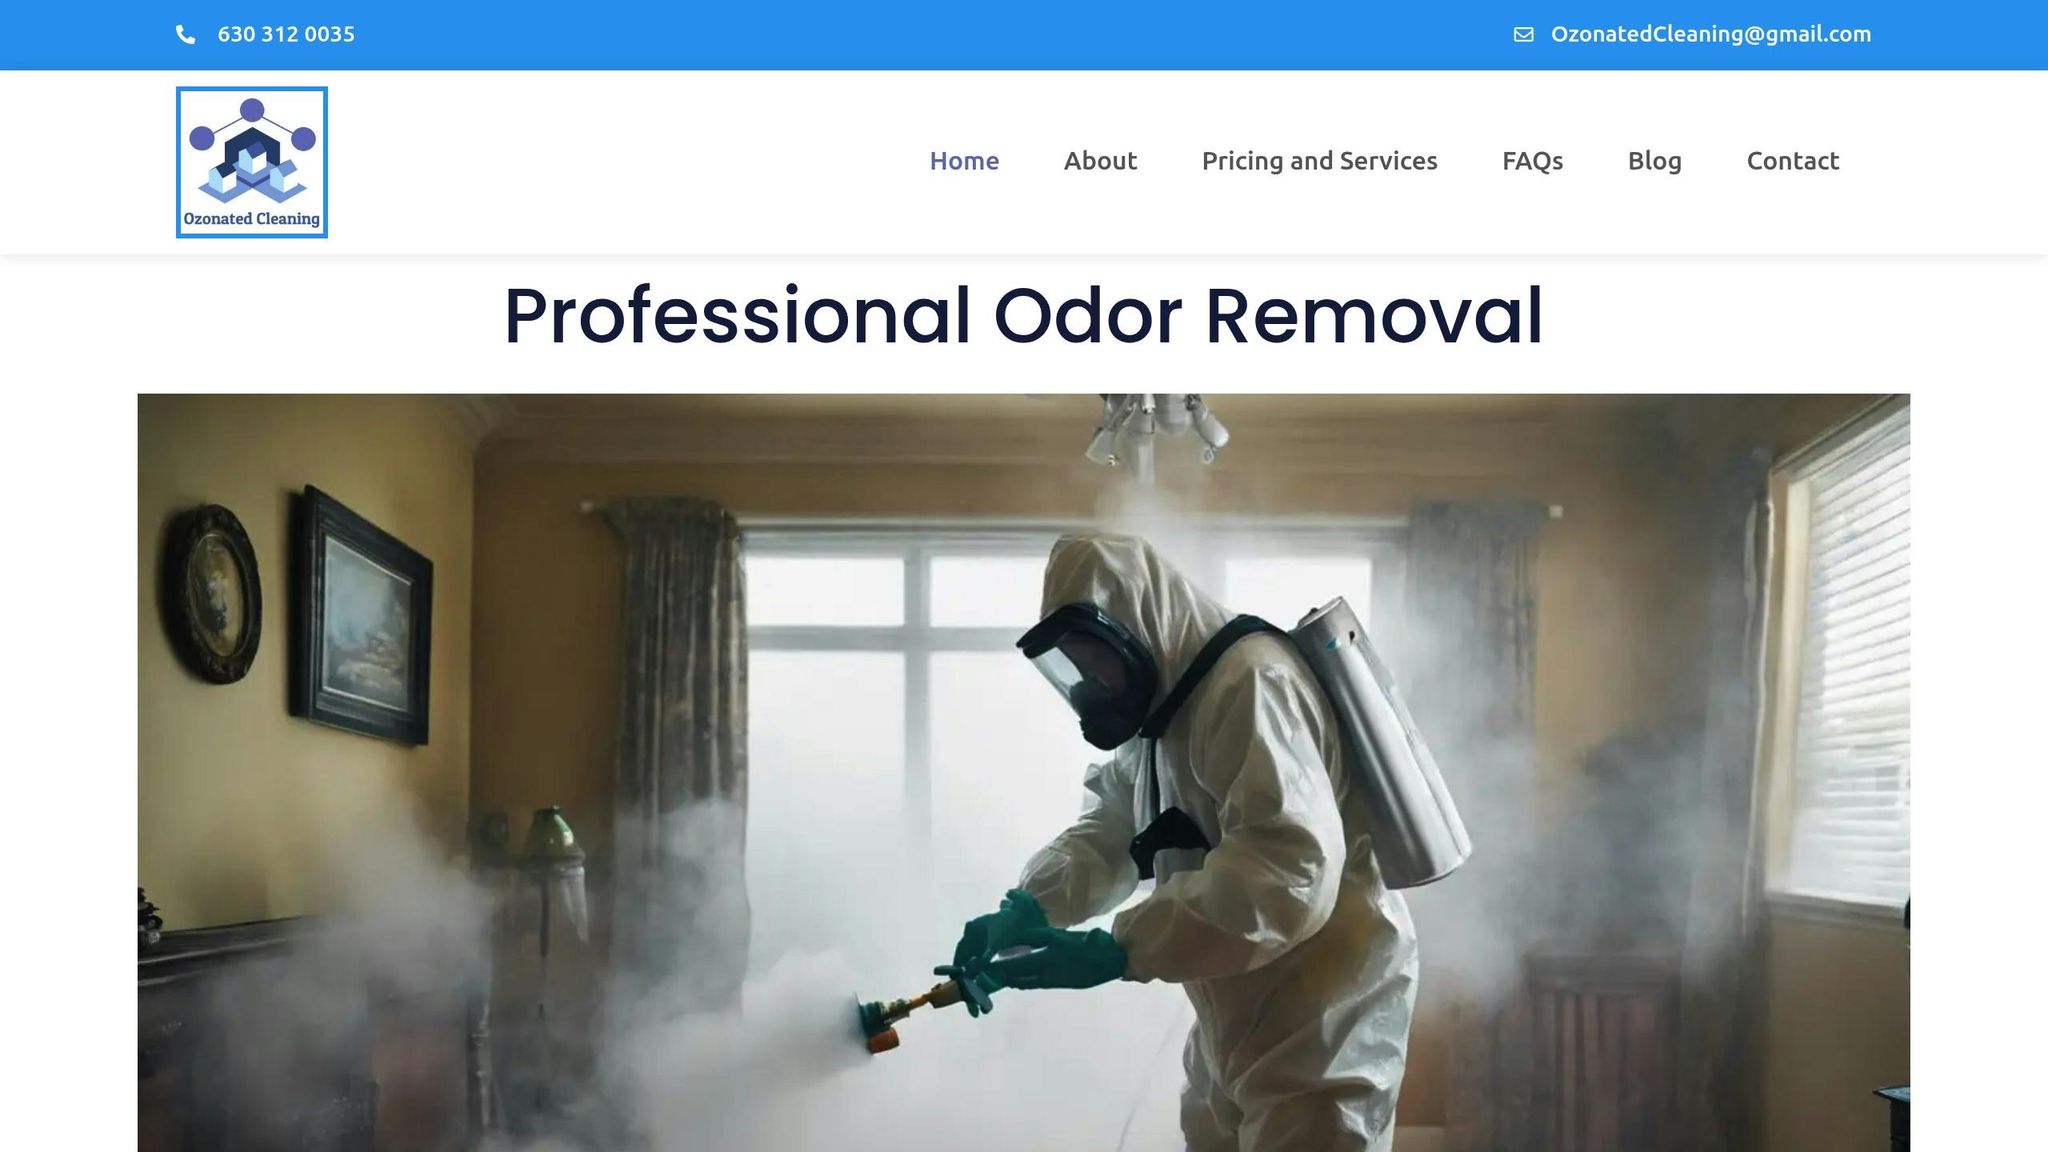
Ozonated Cleaning LLC specializes in fleet-specific solutions, offering professional-grade ozone treatments priced at $200 per truck. They handle a variety of vehicles, from delivery vans to semi-trucks, using equipment that produces over 10,000 mg/h of ozone for quick and effective odor removal. Their expertise goes beyond just cleaning; they understand the challenges of fleet management, such as tight schedules and the importance of driver comfort. By combining ozone and hydroxyl technology, they tackle even the toughest odors while ensuring the safety of vehicle components. This approach ensures vehicles are ready to return to service promptly, keeping fleets running smoothly.
Conclusion
Key Takeaways
Ozone treatment offers a reliable way to tackle fleet odor management by neutralizing odor-causing molecules right at their source. It’s not just about masking smells – this method eliminates them permanently, with impressive success rates: 94–95% for cigarette smoke, 96% for mold and mildew (when moisture issues are resolved), and 89% for pet odors. Beyond odor removal, ozone treatment also sanitizes interiors by killing bacteria, viruses, and allergens, promoting a healthier environment for drivers and passengers alike.
To get the best results, preparation is key. Start by thoroughly cleaning the vehicle – remove debris, vacuum, and ensure all surfaces are dry. During the treatment, vehicles should remain unoccupied, and the HVAC system should be set to recirculate, allowing ozone to penetrate the ductwork. After the process, ventilate the vehicle for 15–30 minutes to ensure the ozone has safely converted back to oxygen.
Safety is a top priority. OSHA guidelines recommend limiting ozone exposure to 0.1 parts per million over eight hours. Professional-grade equipment ensures that ozone dissipates within 30 minutes after the treatment ends, reducing risks. Additionally, avoid overexposing vehicles to ozone, as prolonged treatments can harm rubber seals and certain plastics.
For fleet operators managing multiple vehicles, companies like Ozonated Cleaning LLC provide industrial-grade ozone generators (producing 10,000+ mg/h) and expert services to ensure consistent results. At $200 per truck, professional treatments can save money in the long run by preventing potential damage and preserving resale value. By following these steps, fleet managers can maintain fresh, odor-free vehicles while enhancing operational efficiency.
Removing Bad Odors From Car – Ozone Generator Tips & Tricks
FAQs
Will ozone treatment damage plastics, rubber, or electronics?
Ozone treatment, while effective, can harm materials like plastics, rubber, and electronics if used excessively. Being a powerful oxidizer, ozone can lead to the breakdown or discoloration of items such as rubber and fabrics. To prevent this, it’s crucial to adhere to safety guidelines and keep treatment durations within controlled limits.
How do I know the vehicle is safe to enter after treatment?
Before getting back into the vehicle, make sure the ozone smell has fully disappeared. This usually takes about 12–24 hours, but it can vary based on things like how well the space is ventilated, the size of the vehicle, and how long the ozone treatment lasted. Ensuring good airflow is key to safely removing the ozone and making the interior ready for use.
Why does the odor come back after ozone treatment?
Odors might come back after ozone treatment if the molecules causing the smell are still trapped in materials such as upholstery, carpets, or air vents. If the source of the odor isn’t fully eliminated or the ozone treatment isn’t carried out properly, the smell can resurface. Ensuring thorough preparation and careful execution of the treatment is crucial for long-term success.
Recent Comments